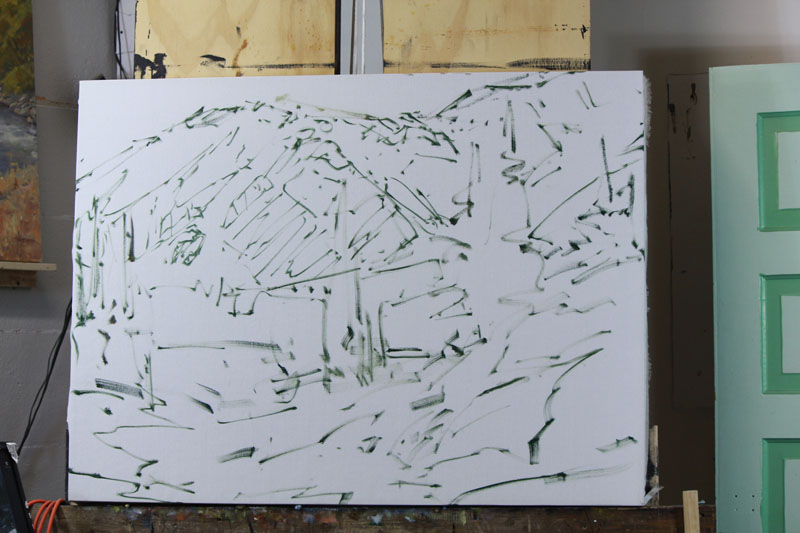
 STEP 1. I decided to photograph this demonstration right after I started it, so I lost what I would consider the actual first step. Before this, would be just a quick line drawing like what you see at the bottom of this step. I loosely outline the integral shapes and think about how those shapes interact with each other. Also at this step I think it’s equally important to think about the “unseen” lines that tie parts of the composition together.
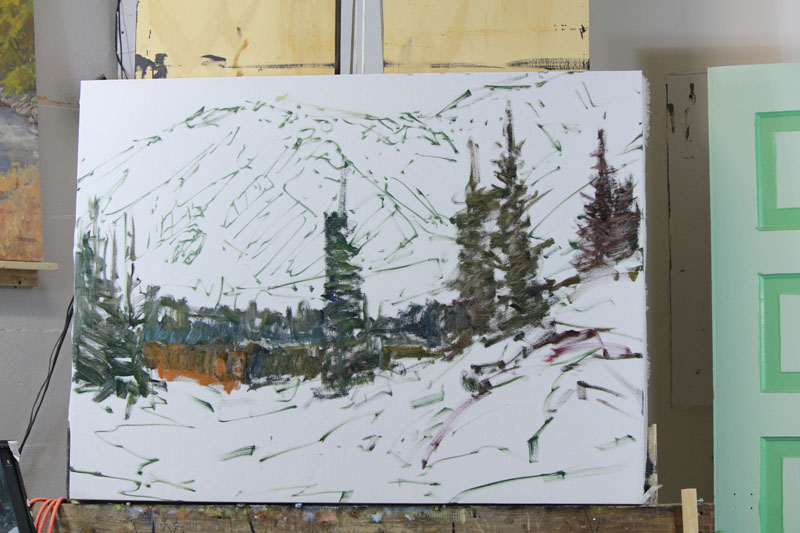
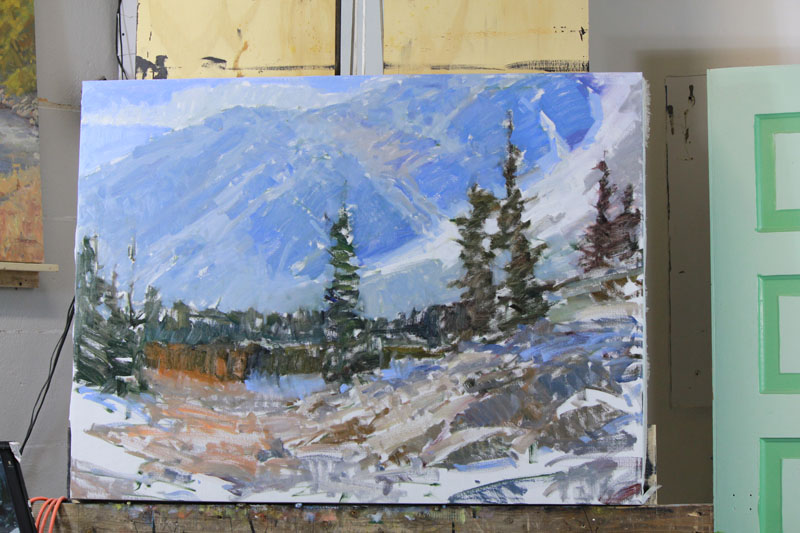
 STEP 2. I start filling in the shapes. I first think in terms of 2 values: the light family and the shadow family. When handling dark valued entities like the junipers and pinyons, their light and shadow families are less discernible than the values in the rocks, so I just connect them with the shadow family. Then I work in the middle values like the background that is heavily influenced by the atmospheric perspective.
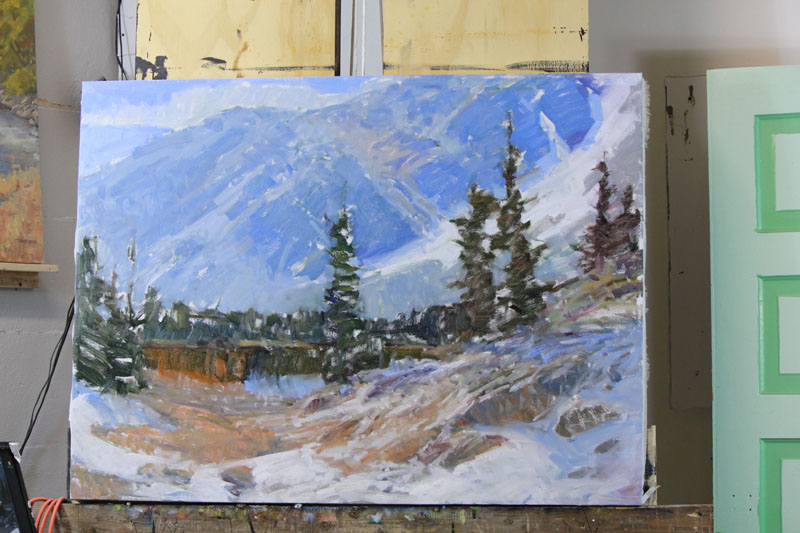
 STEP 3. Almost immediately I go in with some notification of temperature relationships within the shapes. Reflected light is responsible for more saturation in the color within the shadows than local color. I have left the light family of the rocks mostly just the white of the canvas for contrast and will keep it that way for a few more steps.
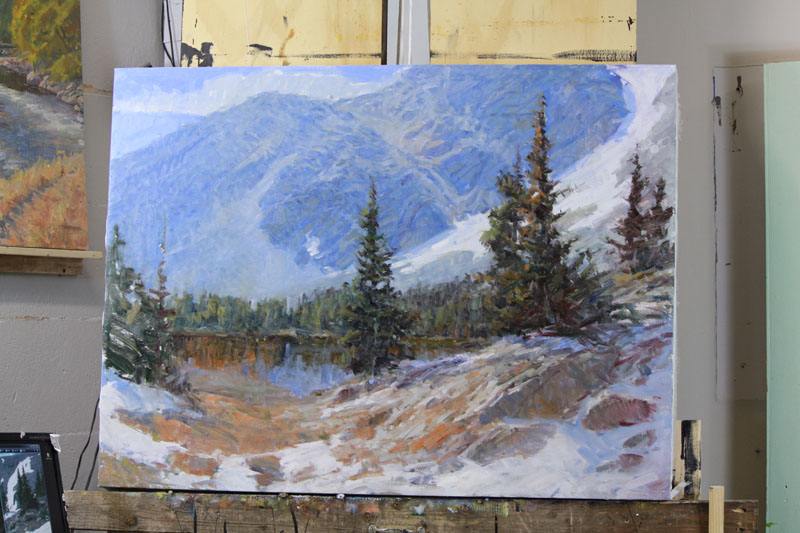
 STEP 4. This is where I will place most of the accents. I consider both hi-lights and darkest darks accents, but in this case, I’m talking about the dark accents (the cracks and crevices in the rocks, the trunks of the trees, etc.). This begins to really define the structure of the rocks and whatnot.
 STEP 5. I redrew the bottom left portion of the rocky ledge for accuracy. For this prominent point, I really am after a sort of portrait of this formation. It is Moran Point at the Grand Canyon, a point where Thomas Moran was said to have painted the area in the late 1800s. This ultimately helped name the canyon a national park, thus preserving it for our and future generations. I’ve also started mixing and painting the dirty areas on the rocks surface as seen in the lower right.
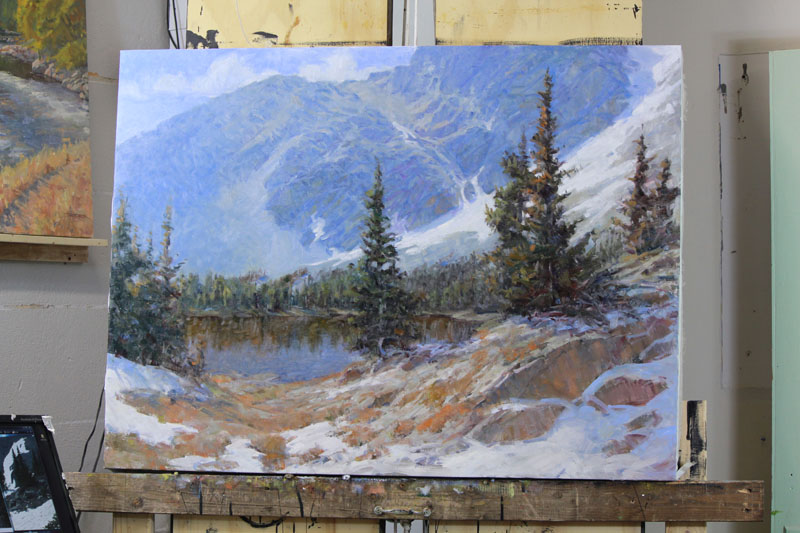
 STEP 6. I have started painting the lit areas of the rock formation. I am careful here to define the side plane of the rocks as the planes receiving most of the light. By controlling this aspect I can effectively change the time of day to earlier morning, making the sun seem lower in the sky.
 STEP 7. More refinement of planes and their respective reflective light. Some more definitive treatment of the trees.
 STEP 8. Further refinement of the side plane of the lit rocks. Also refining the background atmosphere. I am trying to define some the distant formations without losing the focus on the foreground. I have also started spending more time on the trees and am defining their plane changes and describing the form of their dark canopies.
 STEP 9. I realized that the trees on the right were clumsy and made entering the painting somewhat cumbersome. The solution for me was to eliminate some of them in order to organize the foreground a bit further. Before finishing, I wanted to describe some more of the distant walls and formations, while again, not taking away from the foreground. I also drug some darker value through the shadowed side planes of the rock to create the effect of desert varnish.
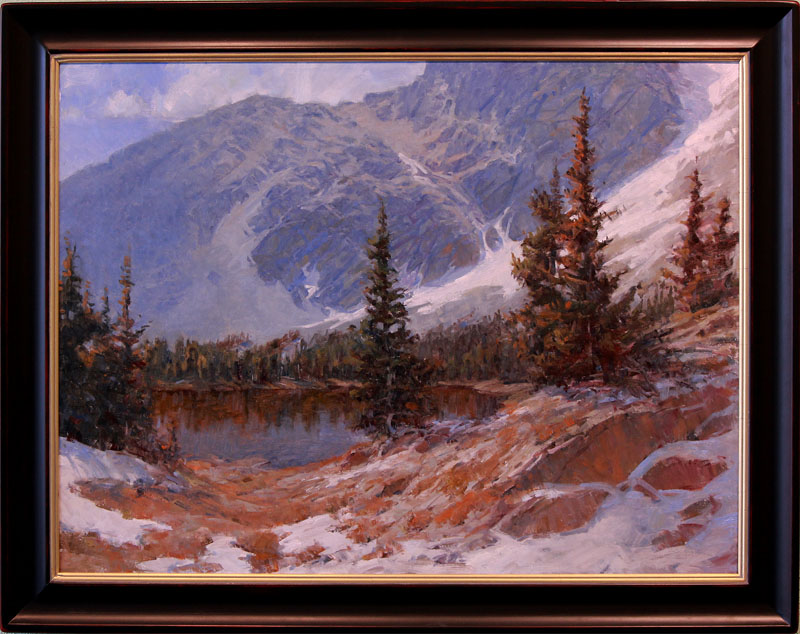
“Historical Inspiration” 18X24 Oil


